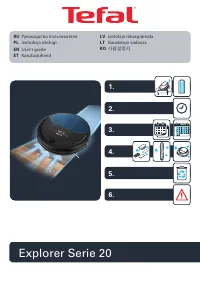
Инструкции к модели Tefal X-Plorer Serie 20 RG6875WH
Инструкция по эксплуатации, Инструкция для Tefal X-Plorer Serie 20 RG6875WH на русском языке в PDF.
Инструкции:
Инструкция по эксплуатации Tefal X-Plorer Serie 20 RG6875WH


Сводка
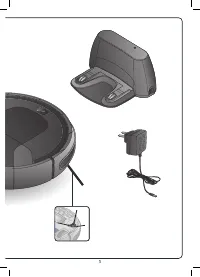
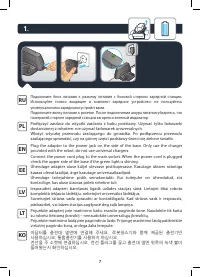
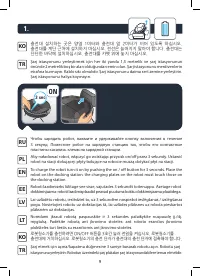
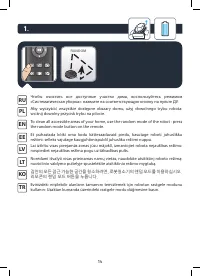
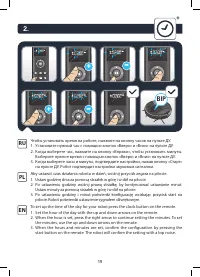
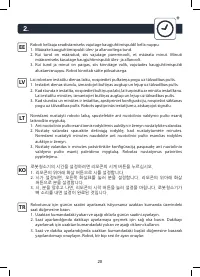
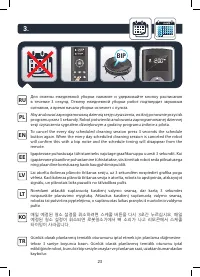
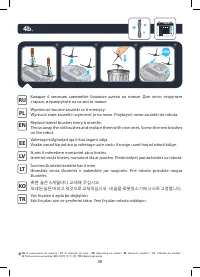
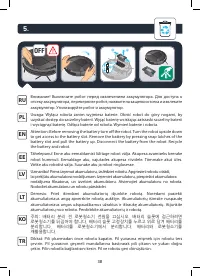
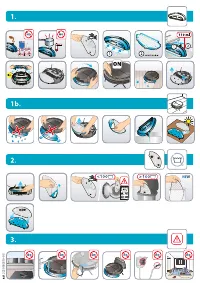
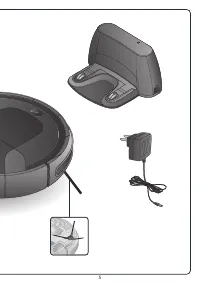
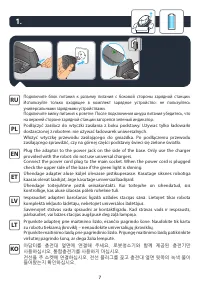
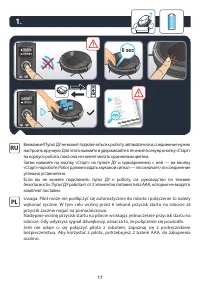
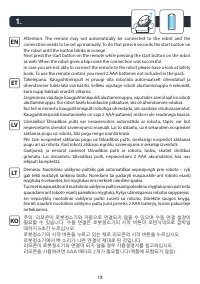
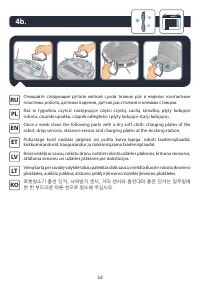
7 Plug the adaptor to the power jack on the side of the base. Only use the charger provided with the robot: do not use universal chargers. Connect the power cord plug to the main socket. When the power cord is plugged check the upper side of the base if the green light is shining. EN Ühendage adapte...
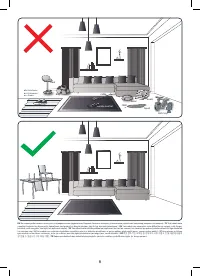
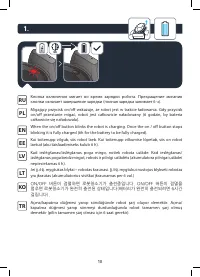
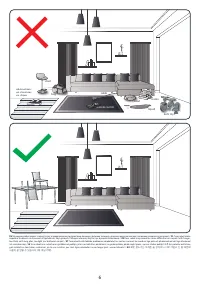
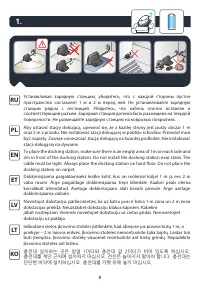
9 Şarj istasyonunu yerleştirmek için her iki yanda 1,5 metrelik ve şarj istasyonunun önünde 2 metrelik boş bir alan olduğundan emin olun. Şarj istasyonunu merdivenlerin etrafına kurmayın. Kablo sıkı olmalıdır. Şarj istasyonunu daima sert zemine yerleştirin. Şarj istasyonunu halıya koymayın. TR 충전대 설...
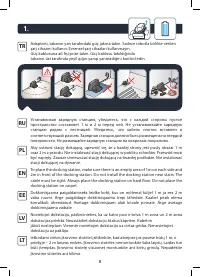
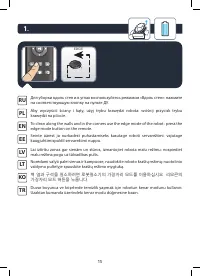
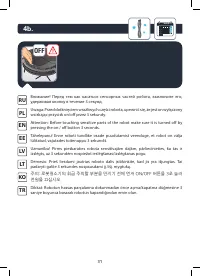
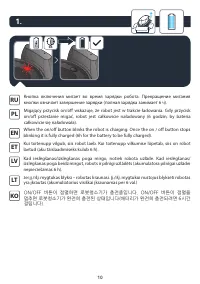
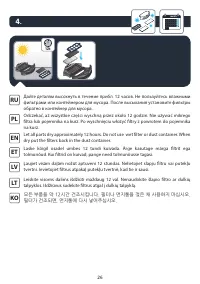
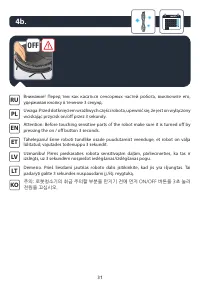
10 When the on/off button blinks the robot is charging. Once the on / off button stops blinking it is fully charged (6h for the battery to be fully charged). EN Açma/kapatma düğmesi yanıp söndüğünde robot şarj oluyor demektir. Açma/ kapatma düğmesi yanıp sönmeyi durdurduğunda robot tamamen şarj olmu...
Инструкция Tefal X-Plorer Serie 20 RG6875WH


Сводка
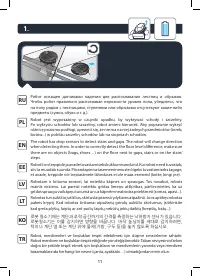
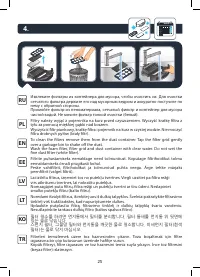
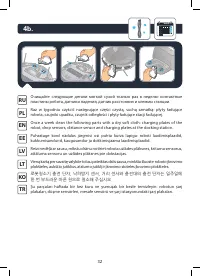
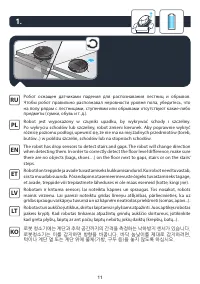
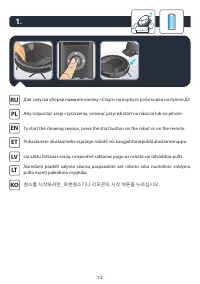
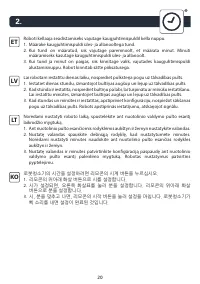
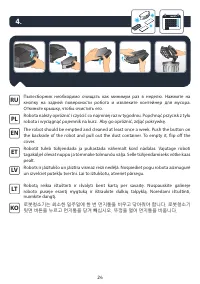
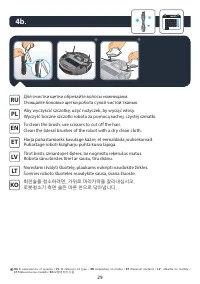
9 To charge the robot turn it on by pushing the on / off button for 3 seconds. Place the robot on the docking station: the charging plates on the robot must touch those on the docking station. EN Lai uzlādētu robotu, ieslēdziet to, uz 3 sekundēm nospiežot ieslēgšanas / izslēgšanas pogu. Novietojiet ...
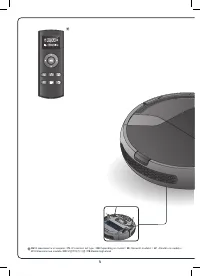
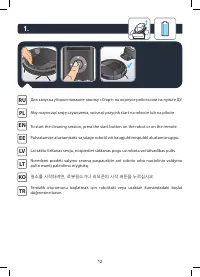
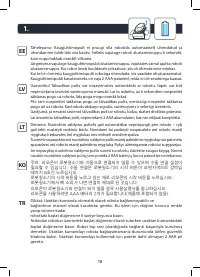
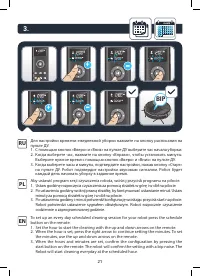
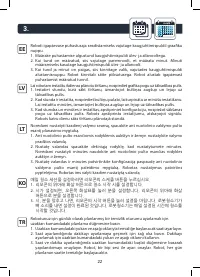
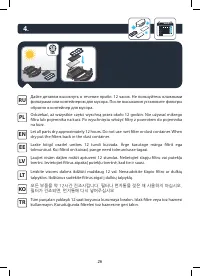
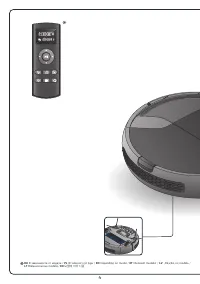
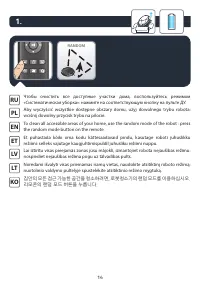
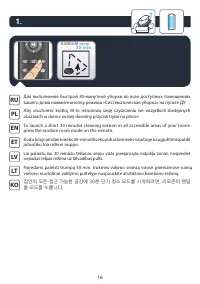
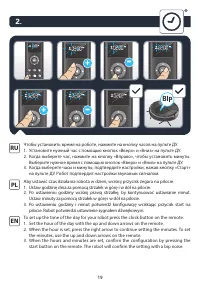
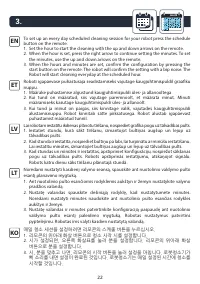
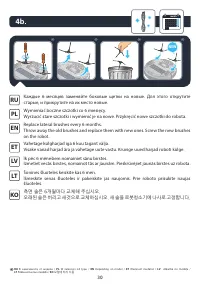
19 To set up the time of the day for your robot press the clock button on the remote. 1. Set the hour of the day with the up and down arrows on the remote. 2. When the hour is set, press the right arrow to continue setting the minutes. To set the minutes, use the up and down arrows on the remote. 3....
21 Для настройки времени ежедневной уборки нажмите на кнопку расписания на пульте ДУ. 1. С помощью кнопок «Вверх» и «Вниз» на пульте ДУ выберите час начала уборки. 2. Когда выберете час, нажмите на кнопку «Вправо», чтобы установить минуты. Выберите нужное время с помощью кнопок «Вверх» и «Вниз» на п...
Tefal Роботы-пылесосы Инструкции
-
 Tefal RG7375WH
Инструкция по эксплуатации
Tefal RG7375WH
Инструкция по эксплуатации
-
 Tefal RG8021RH Smart Force Cyclonic Connect
Инструкция по эксплуатации
Tefal RG8021RH Smart Force Cyclonic Connect
Инструкция по эксплуатации
-
 Tefal Smart Force X-plorer RG6825WH
Инструкция по эксплуатации
Tefal Smart Force X-plorer RG6825WH
Инструкция по эксплуатации
-
 Tefal X-plorer Serie 20 RG6871WH
Инструкция по эксплуатации
Tefal X-plorer Serie 20 RG6871WH
Инструкция по эксплуатации
-
Tefal X-plorer Serie 20 RG6871WH
Инструкция
-
 Tefal X-Plorer Serie 40 RG7267WH
Инструкция по эксплуатации
Tefal X-Plorer Serie 40 RG7267WH
Инструкция по эксплуатации
-
Tefal X-Plorer Serie 40 RG7267WH
Инструкция
-
 Tefal X-Plorer Serie 40 RG7275WH
Инструкция по эксплуатации
Tefal X-Plorer Serie 40 RG7275WH
Инструкция по эксплуатации
-
Tefal X-Plorer Serie 40 RG7275WH
Инструкция
-
 Tefal X-Plorer Serie 50 RG7387WH
Инструкция по эксплуатации
Tefal X-Plorer Serie 50 RG7387WH
Инструкция по эксплуатации
-
Tefal X-Plorer Serie 50 RG7387WH
Инструкция
-
 Tefal X-plorer Serie 60 (RG7455WH)
Инструкция по эксплуатации
Tefal X-plorer Serie 60 (RG7455WH)
Инструкция по эксплуатации
-
Tefal X-plorer Serie 60 (RG7455WH)
Инструкция
-
 Tefal X-plorer Serie 60 Allergy Kit (RG7447WH)
Инструкция по эксплуатации
Tefal X-plorer Serie 60 Allergy Kit (RG7447WH)
Инструкция по эксплуатации
-
 Tefal X-Plorer Serie 75 Animal RG7675WH
Инструкция по эксплуатации
Tefal X-Plorer Serie 75 Animal RG7675WH
Инструкция по эксплуатации
-
Tefal X-Plorer Serie 75 Animal RG7675WH
Инструкция
-
 Tefal X-Plorer Serie 75 Total Care RG7687WH
Инструкция по эксплуатации
Tefal X-Plorer Serie 75 Total Care RG7687WH
Инструкция по эксплуатации
-
Tefal X-Plorer Serie 75 Total Care RG7687WH
Инструкция
-
 Tefal X-plorer Serie 80 RG7765WH
Инструкция по эксплуатации
Tefal X-plorer Serie 80 RG7765WH
Инструкция по эксплуатации
-
Tefal X-plorer Serie 80 RG7765WH
Инструкция